WP Register Profile PRO
This is a user Registration plugin, it can be used with either Widget or Shortcodes. Just install the plugin and add the register widget in the sidebar. The form structure is responsive. The plugin can be used for Subscription as well. Payment for PAID subscriptions are handled by WooCommerce for ease of use. Pages, Posts and Custom Post Types can be made hidden to users based on subscriptions. Shortcode lists are provided below with details. This plugin comes with a FREE Addon AP Email Template Addon
$2.00
If you need support please Email us at [email protected]
All updates & support available for 1 year. Current Plugin (Version 5.5.6)
This plugin is tested upto
WordPress (Version 6.4.3)


Shortcode and Features
1. Registration, use this [rp_register_widget] shortcode to display registration form in post or page.
Example: [rp_register_widget title="User Registration"]
Multiple Registration forms can be created. Forms can be mapped to different User Roles. For example you want to create a registration form for "Authors". So you create a separate registration form say "Authors Registration" ( Suppose ID of the form is 24 so the shortcode will be [rp_register_widget form="24"] ) with fields specific to "Authors" only. Then you map the form with user role "Author". Now each user makes registration with this form will have the Role as "Author".
Same way you can create multiple forms for different user roles.
2.
User Data, use this
[rp_user_data field="first_name" user_id="2"] shortcode to retrieve user data.
user_id can be blank. if blank then the data is retrieve from currently loged in user. Or else you can use this function in your template file to retrive data.
<?php echo rp_user_data_func("first_name","2"); ?>
For
date type fields one additional parameter
dateformat can be passed to the shortcode with the desired date format. For example,
[rp_user_data user_id="2" field="dob" dateformat="jS F, Y"] will output something like this
26th July, 2016 and for use in the template files use function call like this.
<?php echo rp_user_data_func("dob","2","jS F, Y"); ?>
For
User Profile Image use this
[rp_user_data field="reg_profile_image" user_id="2"] shortcode or use this function in template
<?php echo rp_user_data_func("reg_profile_image","2"); ?>
3. User Profile, use this [rp_profile_edit] shortcode for user profile page. Logged in usres can edit profile data from this page.
Multiple profile edit forms can be created too. You can create separate profile edit forms based on different User Roles. This way it will be possible for you to create different profile fields based on user roles. For example you create a profile form for "Editors" only. ( Suppose ID of the form is 26 so the shortcode will be [rp_profile_edit form="26"] ) Now only users with User Role as "Editor" will have access to this form.
4. Update Password, use this [rp_update_password] shortcode to display Update Password form.
5. View Subscription Packages, use this [subscription_view id="1" link="http://example.com/register/"] shortcode in your page to display individual subscription details. Here "id" is subscription id, which in this case is "1". "id" can be 1, 2, 3 etc ( "id" is required, "link" is optional ).
6. Subscription Details of User, Use this [subscription_user_data title="Subscription Details"] shortcode in your page to display user's subscription status. This shortcode will display subscription status of the currently logged in user Active/ Inactive.( "title" is optional ).
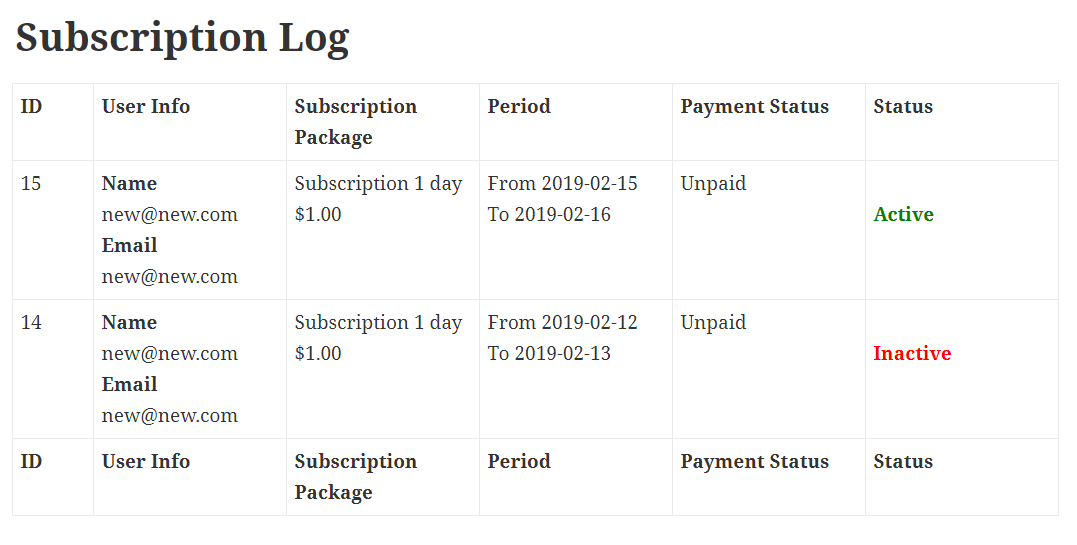
7. View Subscription History, Use this [rp_subscription_log title="Subscription Log"] shortcode in your page to display user's subscription logs / subscription history.
AP Email Template Add-on ( FREE )
This is an Email Template addon plugin for PRO plugins available at aviplugins.com. This will allow you to customize Email Template easily, make your emails look more professional. This Add-on is FREE to download. Once you purchase WP Register Profile PRO you will get a plugin KEY. Please use that KEY to download this Add-on.
Sample Email Template Easily Customizable
 Email Template Settings
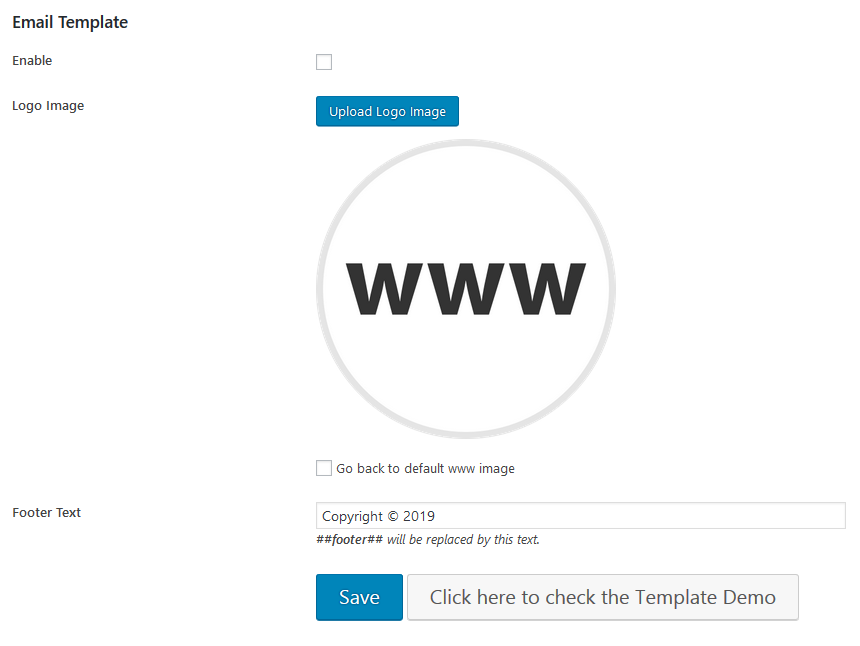 Change the WWW LOGO to your LOGO and change the Footer text. It's Easy!
Usage
The setup of this plugin is simple. Open the plugin settings page Settings -> WP Register Settings and save some settings. A detailed explanation of how the plugin works and what can be done by this plugin are given below.
Usage Details
New User Registration

User registration form. Use widget or shortcodes to display this in your theme. [rp_register_widget]. Extra custom fields can be added from admin panel.
User Profile
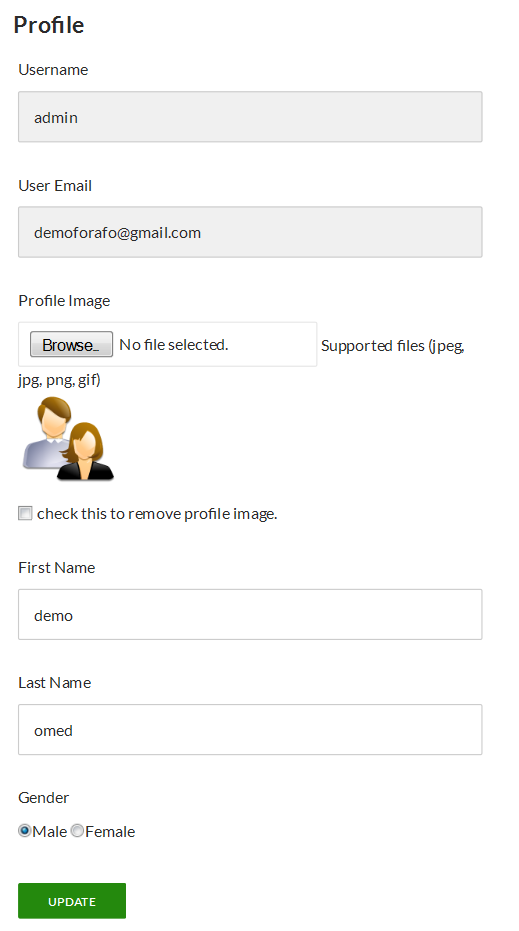
Profile edit, from here users will be able to update their personal informations. Use this [rp_profile_edit] shortcode to dispay edit profile form in your page. Extra custom fields can be added from admin panel.
Create File type fields
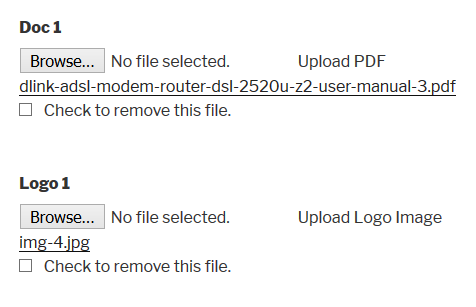
Create File type fields in the Registration and Profile forms. This will allow administrator to create unlimited number of file fields so that user can upload files at the time of registration or at their profile page. Supported file types can be selected from plugin settings page.
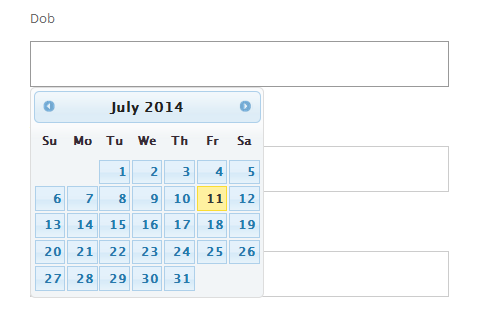
Create a date type field
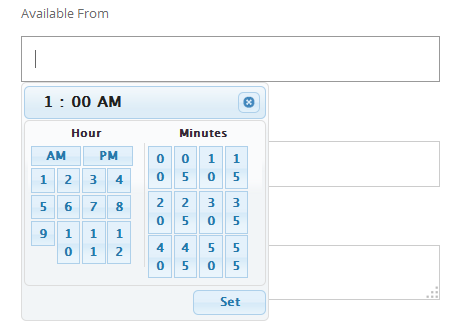
 Create a time field
 Update Password
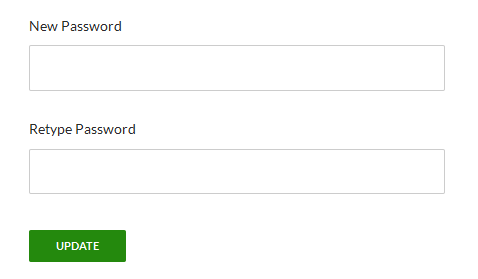
Update password, from here users will be able to update their login password. Use this [rp_update_password] shortcode to display update password form in your page.
To use Login Widget please install Login Widget With Shortcode from wordpress.org, or Facebook Login Widget (PRO). Facebook Login Widget (PRO) has social login features, users will be able to login using Facebook, Google, Twitter, LinkedIn, Microsoft and Yahoo accounts.
Login Widget
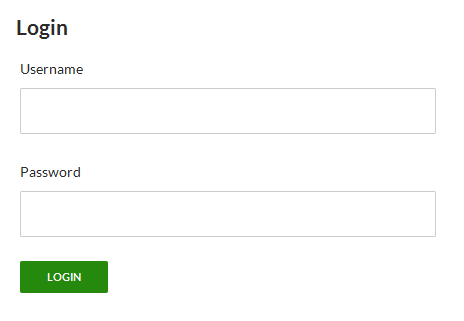
User Login Widget, users will be able login to their account. Use this [login_widget] shortcode to display login form in your page.
Reset Password Form
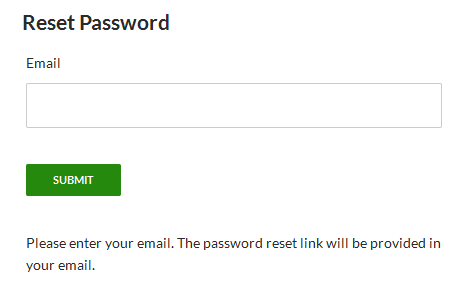
Users will be able to reset their password from here. Forgot password link can be added to login widget from plugin settings page. Use this [forgot_password] shortcode to display reset password form in your page.
Registration & Profile Form Fields
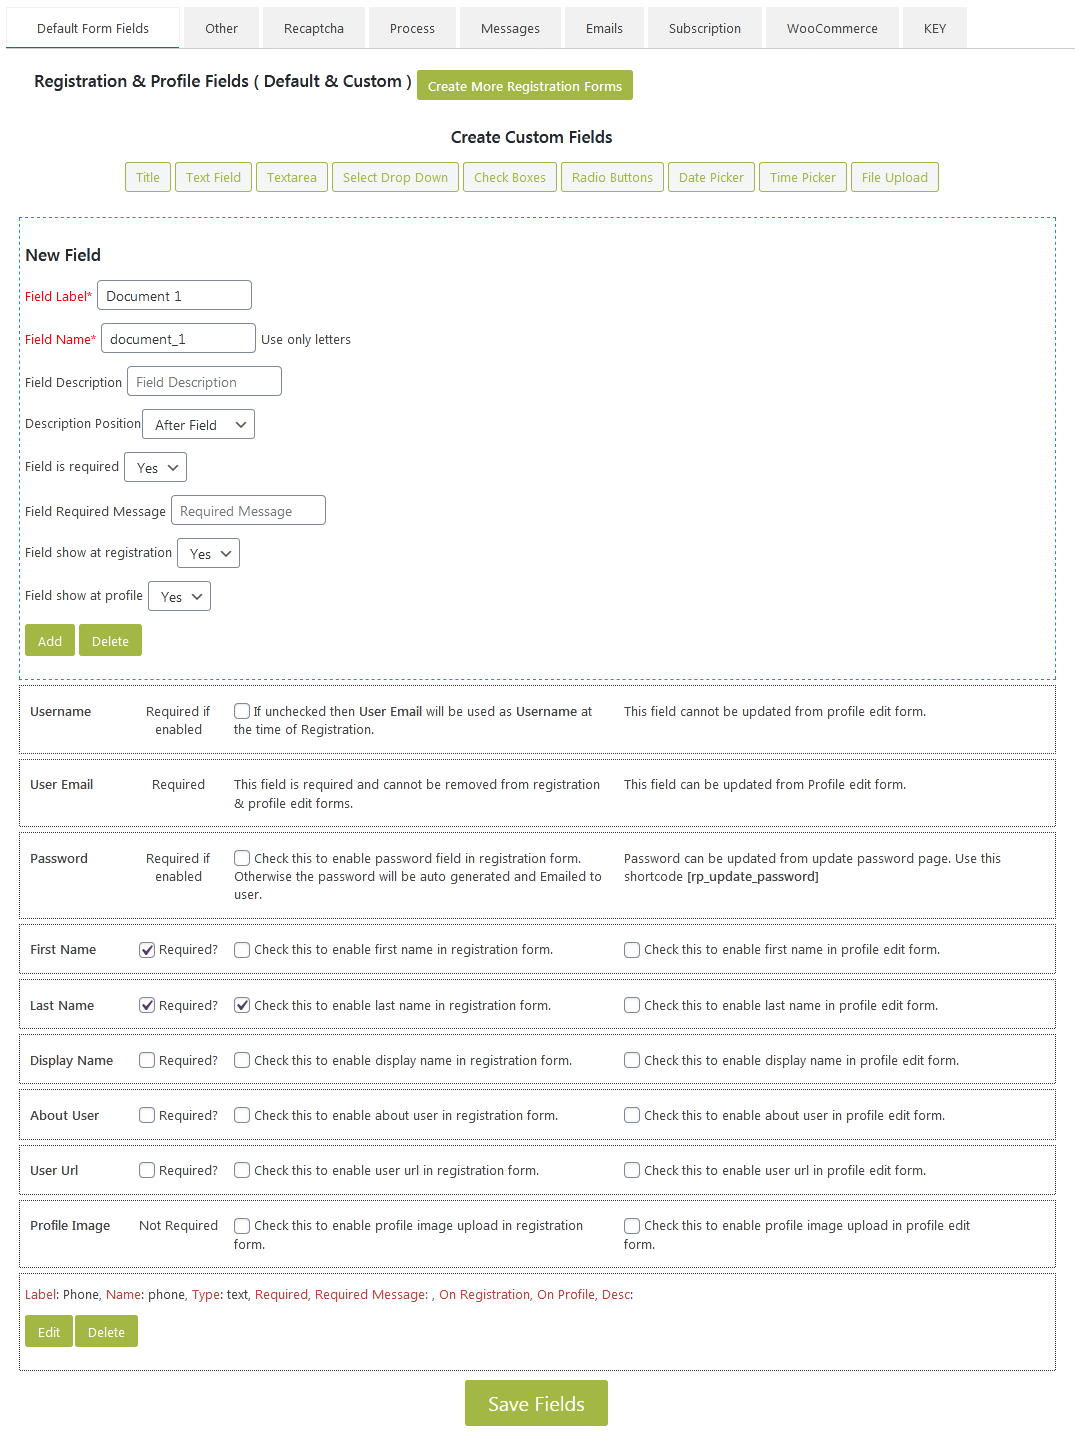 Sort Registration & Profile Fields by Drag & Drop
Here additional custom fields can be created which can be used at the time of registration or at profile edit page. Custom fields like textbox, textarea, select, date, time, checkbox and radio button can be generated dynamically. These fields can be sorted by Drag & Drop
Other Settings
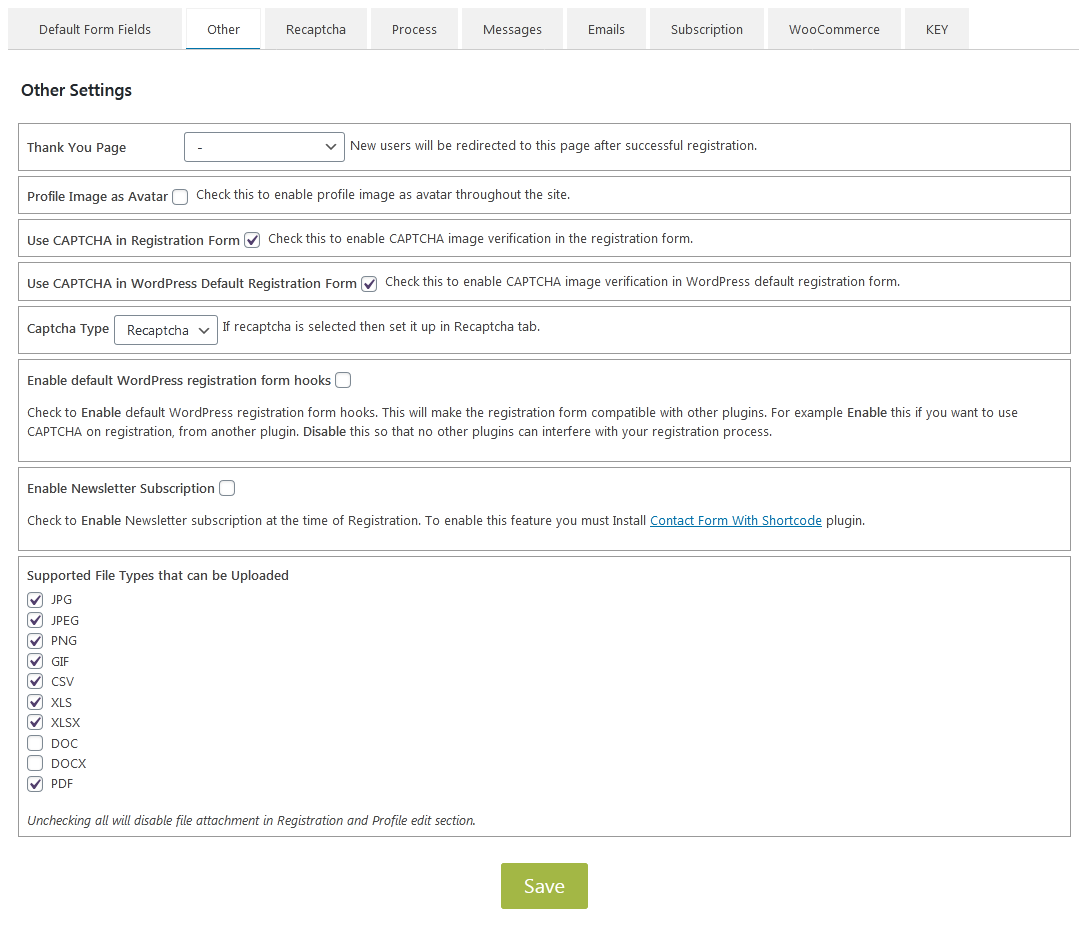
1. Choose Thank you Page after successful registration.
2. You can enable profile image upload at the time of user registration or at the profile update page.
3. Profile image can be used as avatar. If this is enabled then profile image will be used as user avatar throughout the site. When user posts a comment his profile image will be displayed instead of the defalut wordpress avatar.
4. Plugin compatibility option with other plugins.
5. Auto subscribe users to Newsletter Emails at the time of registration.
6. Select the File types that you want your users to be able to upload.
Google reCaptcha Settings
 Manage Google reCaptcha Settings.
Registration Process
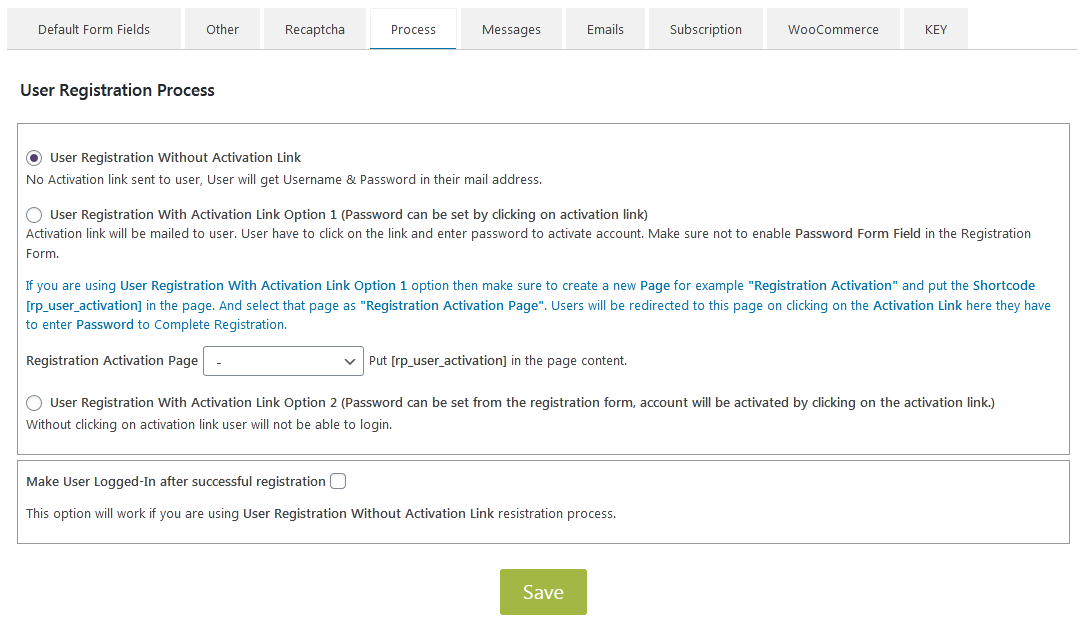
Choose the way you want user registration.
1. Registration without Activation Link
In this process user will get login information like Username and Password in their email.
2. Registration with Activation Link
In this process user will get an Activation link in their email address. By clicking the activation link users will be redirected to page where they have to enter password. After that they will be able to login.
Success Message
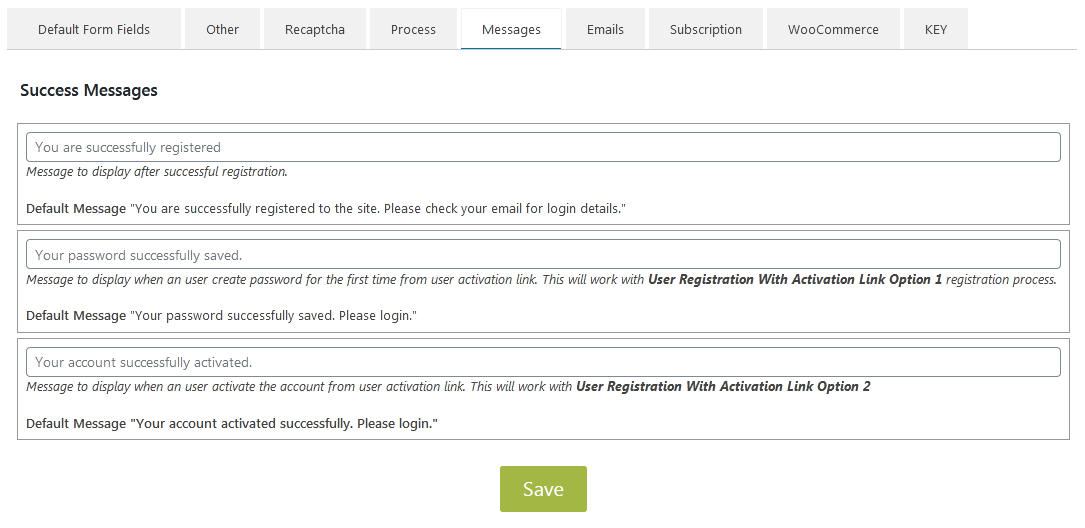 Update default registration success message.
Email Settings
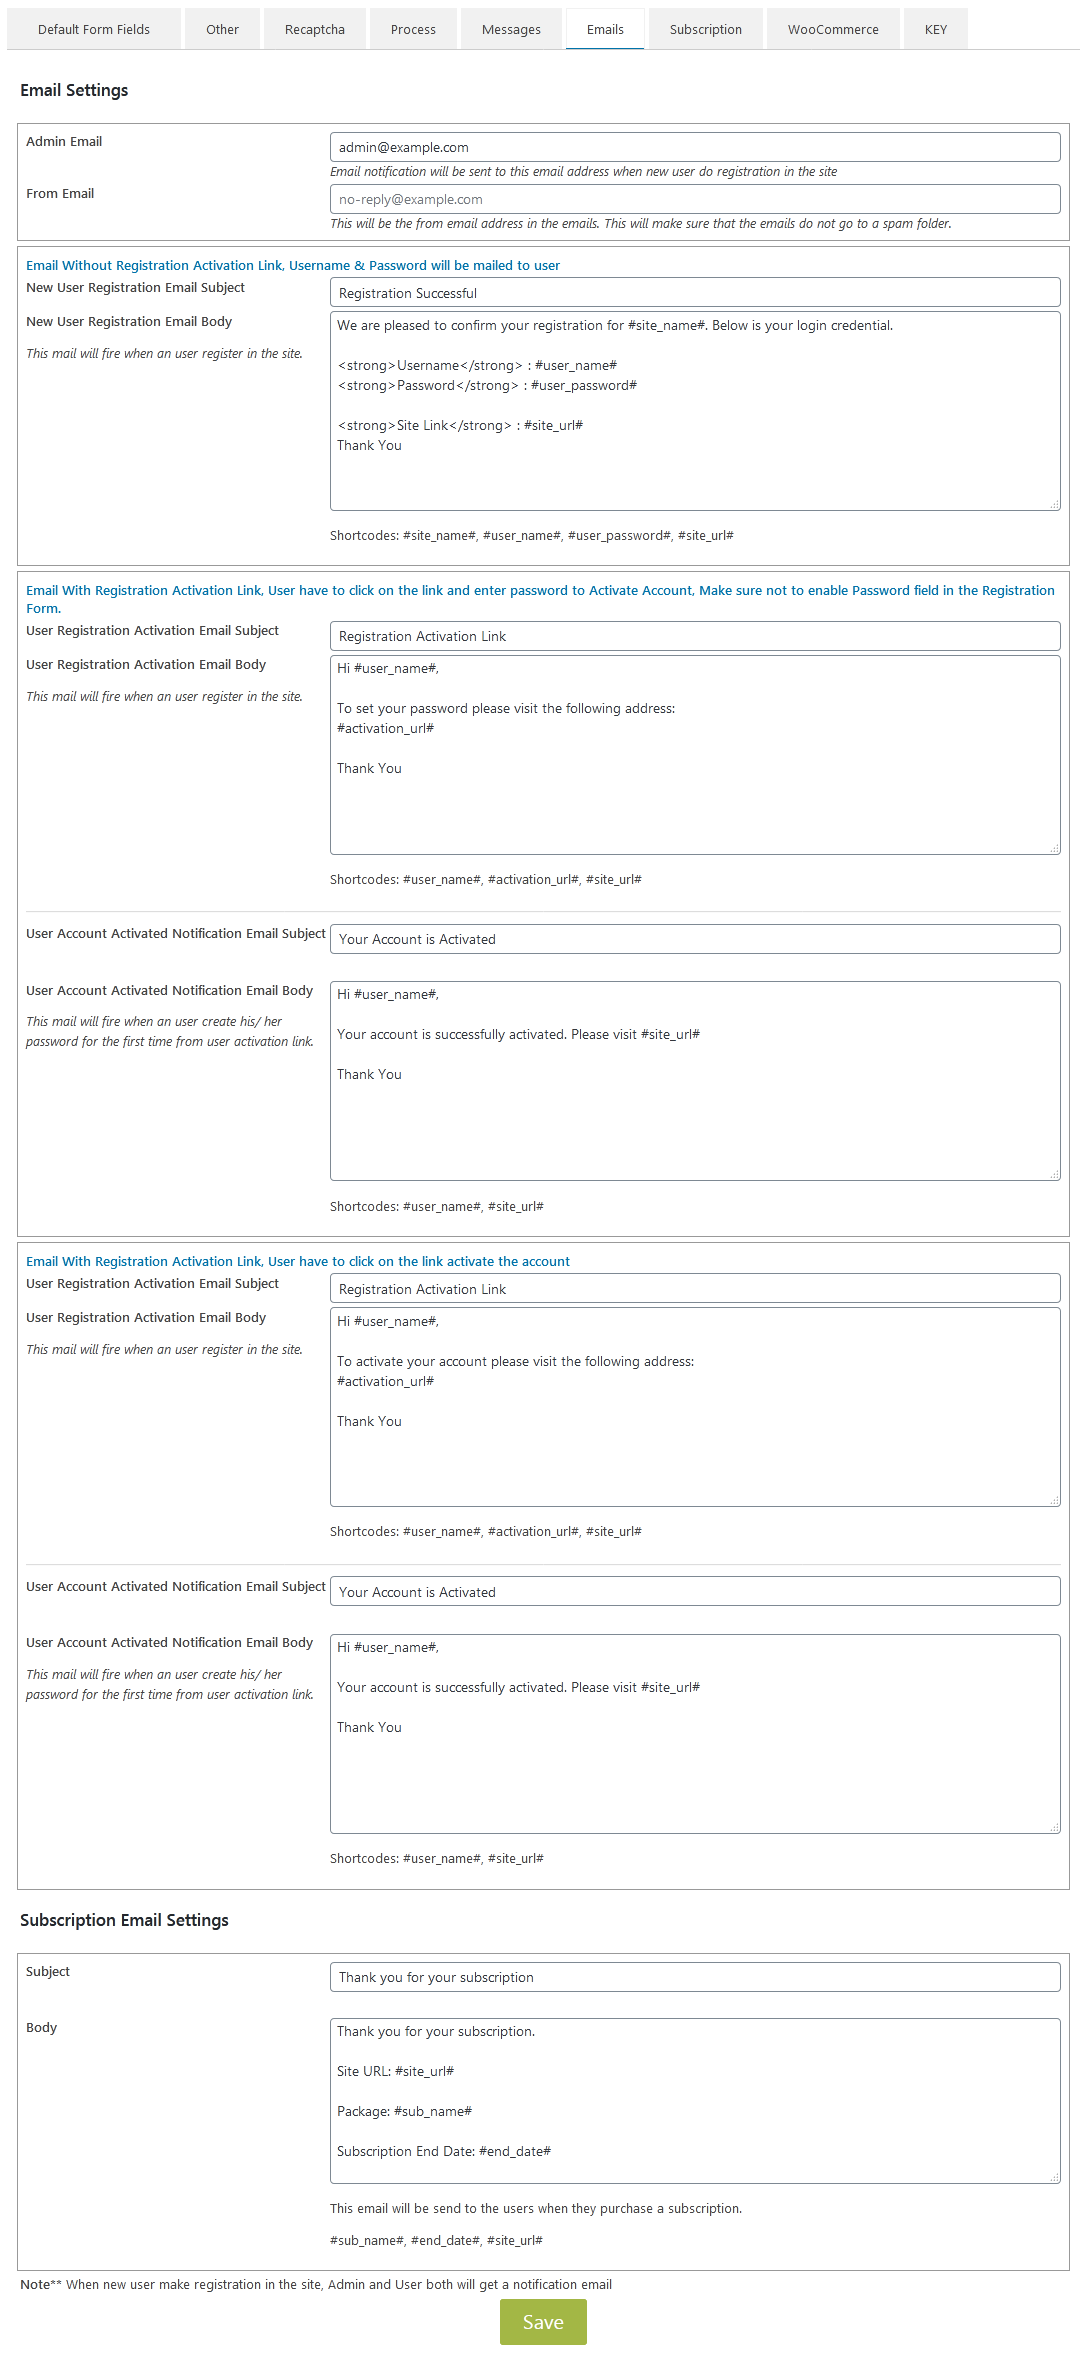 Manage new user registration email contents.
Subscription Settings
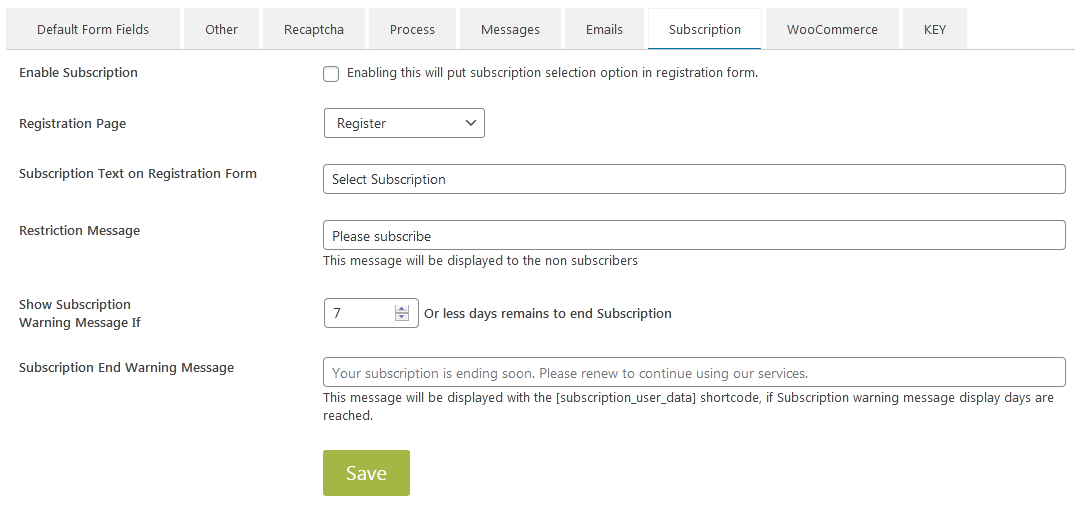 Manage subscription settings.
WooCommerce Settings
 Manage WooCommerce settings.
Plugin Key
 Each plugin comes with an unique key. This key ensures that your plugin has a valid license. Plugin key can be used to get informations about the latest version available to download. Key has to be entered in the plugin settings section.
Subscription Usage
The plugin can be used for user subscription as well. If enabled users will have to subscribe to a package before registration. Subscriptions can either be FREE or PAID. Payment for PAID subscriptions are managed by WooCommerce.
User Subscription
User Subscription Status
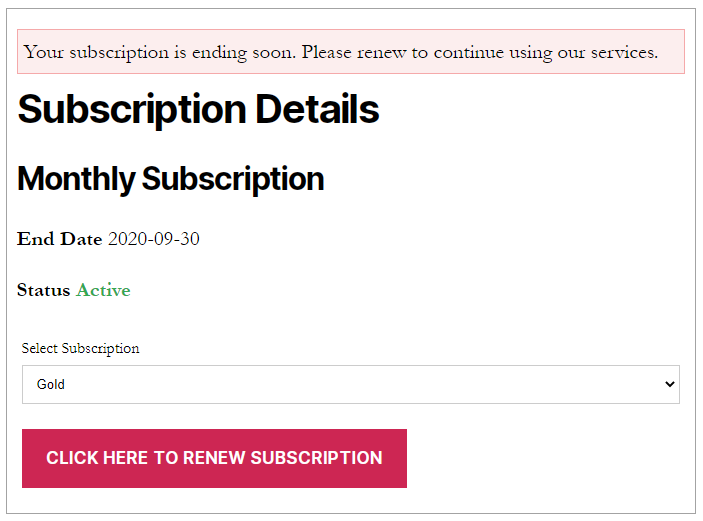
Use this shortcode [subscription_user_data] in your page to display Subscription Status of currently logged in user. Here Subscription Name, Subscription End Date, Subscription Status will be shown. Subscribed users will be able to Review their subscription with this shortcode.
Subscription Packages
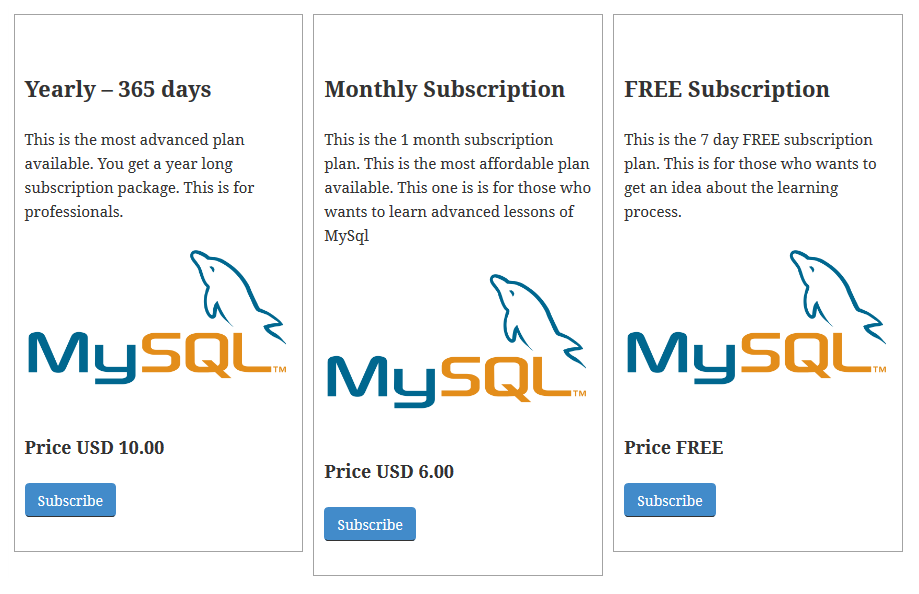
Use this shortcode [subscription_view id="1"][subscription_view id="2"][subscription_view id="3"] in your page to display subscription packages. There are two parameters available with this shortcode
1. id - Use id to display specific subscription package details.
2. link - Use link parameter to specify your prefered url so that users redirected to that url when clicking on "Subscribed" button. If link is not provided then user will be redirected to Supscription Page, from here users will be able to subscribe.
Check Subscription Status
Easily find out if a specific user has active subscription. Using this function user_has_active_subscription($USER_ID) and passing USER_ID as the parameter subscription status of the user can be easily verified. If USER_ID is not given then subscription status of currently logged in user will be returned.
Example
		  <?php

		  if (function_exists('user_has_active_subscription')) {

		  if(user_has_active_subscription(2)){

		  echo 'Subscription is Active';

		  } else {

		  echo 'Subscription is not Active';

		  }

		  }

		  ?>
Restrict Pages or Posts
Content of pages & posts can be restricted from admin panel easily. But in occations you may have to restrict the whole page form non subscribers. For those occations you have to include this function sub_restrict_page() at the top of the page or post. You can use this function in custom template as well.
Example
		  <?php

  sub_restrict_page();

  get_header();

  ?>

  <div id="main-content" class="main-content">

  <div id="primary" class="content-area">

  <div id="content" class="site-content" role="main">

  <?php

  while ( have_posts() ) : the_post();

  get_template_part( 'content', 'page' );

  endwhile;

  ?>

  </div>

  </div>

  <?php get_sidebar( 'content' ); ?>

  </div>

  <?php

  get_footer();

  ?>
Subscription Setup
A detailed explanation on how to setup subscription is described below.
Subscription Setup Details
If you want to implement user subscription at the time of registration then the first thing that you need to do is Enable Subscription in the plugin settings page. To do that check the box named Enable Subscription and hit Save button. This will enable subscription functionality at the time of user registration. Users will not be able to register to your site without selecting a subscription plan.
Now it's time to create subscription packages.
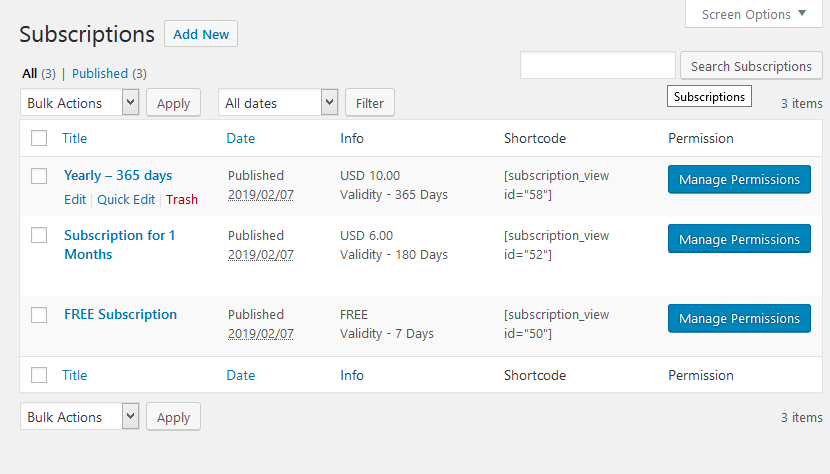 User Access Permissions can be given from here. Contents for Pages, Posts, Custom Post Types can be restricted easily from this screen
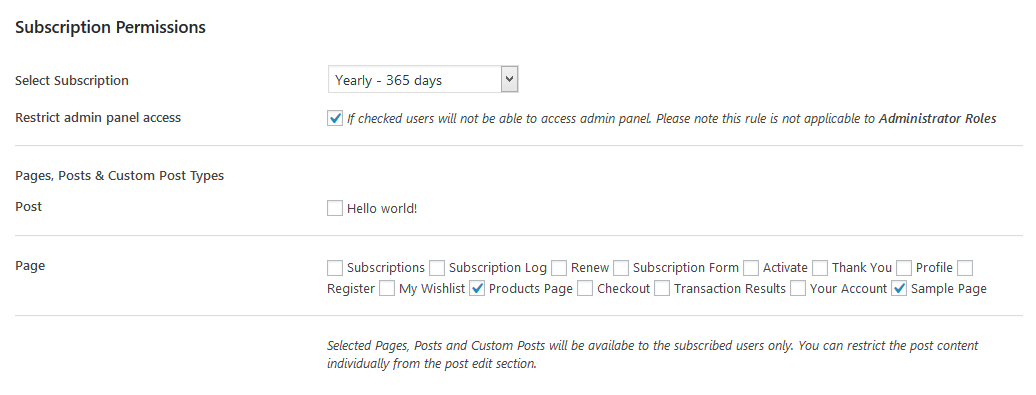
Checked Pages, Posts, Custom Posts will be Restricted from users who are not subscribed. Individual Posts can also be Restricted from post edit section.
The next step is setting up the payment. For processing the payment this plugin uses WooCommerce. The first thing that needs to be done is enabling Guest checkout in WooCommerce settings. For that go to WooCommerce -> Settings -> Accounts & Privacy -> Guest checkout -> and enable "Allow customers to place orders without an account". After that products needs to be created in WooCommerce and then the product needs to be selected in the Packages. Packages which have product selected/ mapped will become PAID subscription. And Packages which do not have any product selected will become FREE subscription.
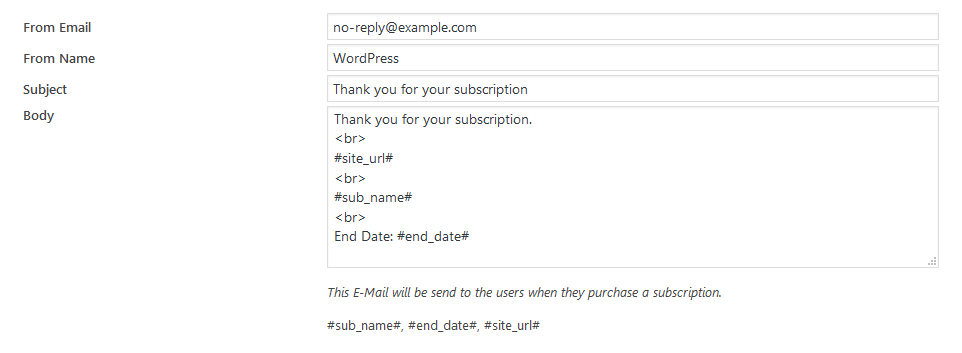
The last step is setting up emails. This email will be sent to users when they subscribe or renew their subscription package.
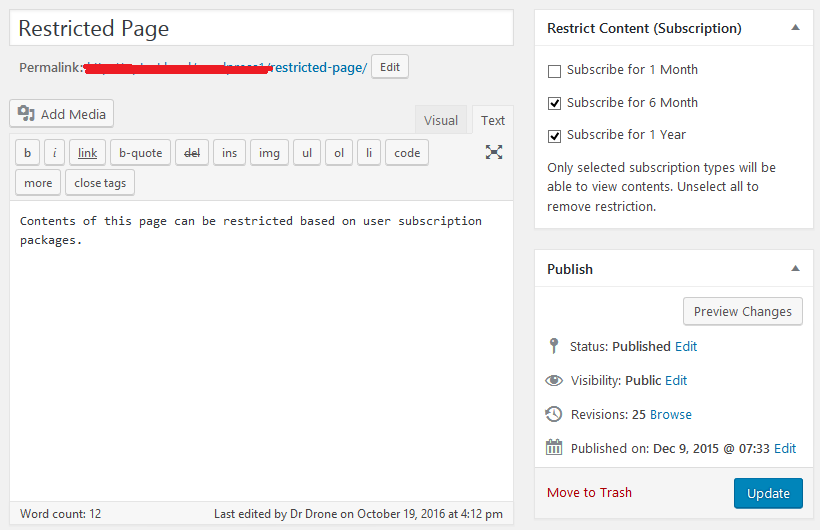
Specific Page or Post contents can be restricted from general users of the site. Only subscribed members will be able to access those page. Restriction can be applied from post edit section.
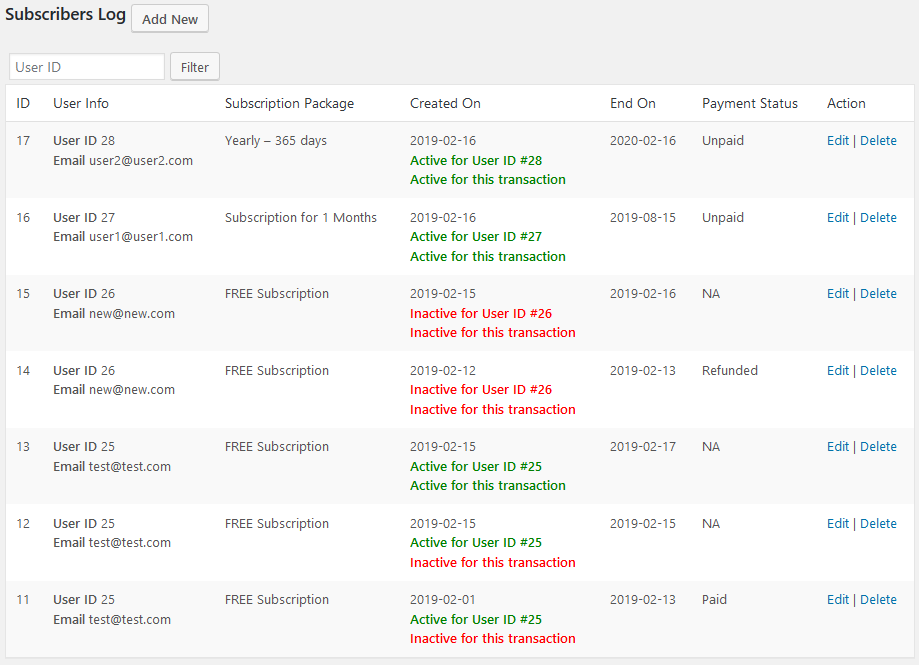
 Subscribers Log Administrators of the site can manage/ modify user subscriptions from here.
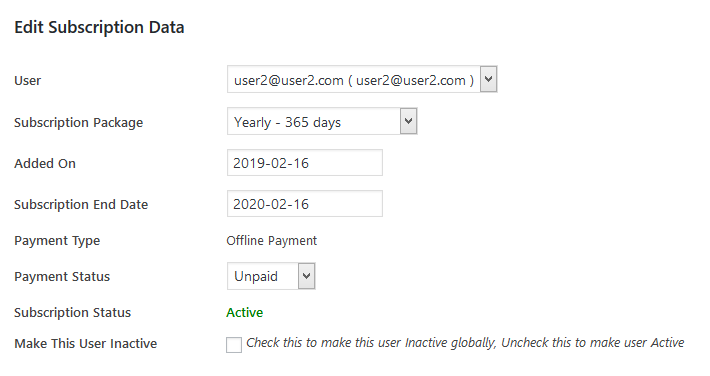
 Subscription Edit
 User's Subscriptions Log
Multilingual Note *
WP Register Profile PRO is a multilingual plugin. To use this plugin in your native language you have to translate the plugin text in your language. Please click here for a sample wp-register-profile-with-shortcode-da_DK.po Danish language file. Once the translation is done please mail the translated file to [email protected] and we will convert that file and mail you back with the translated .MO file, which you have to put in the languages directory inside the plugin.
License and Agreement
Please read the plugin license


